Showing posts with label crafts. Show all posts

Wednesday, November 14, 2012

DIY Packaging for my Etsy Store :)


I've been moving pretty slowly these past couple days because of this annoying cold I caught, but one thing has been bringing a smile to my face and that's making my own little tags, etc. for packaging things for my etsy shop http://www.etsy.com/shop/ColorMeFun.  I designed a logo myself on photoshop and bought a custom stamp from JLMould using the design I made.  It should come any day now and I can't wait to stamp all over my boxes (bought at Uline.com) and handmade tags!

I modified my little logo and printed it (on my computer printer!) on scrap-booking card stock to make backs for my fabric covered button bobby pins.

For Sale at http://www.etsy.com/shop/ColorMeFun
I used an exacto (spelling?_?) knife to cut slits on both sides of the middle so I could slide the bobbies on easily. 

I also bought a label shape die-cut punch on sale from the craft store and punched a bunch of tags from scrap-booking paper.  I've also set aside some boxes from Indian food packages that I'm going to re-purpose into tags.  The size of the custom stamp is the size of the tag so I will be able to stamp my blank tags with my logo in any color ink I want.

For other items like bracelets and headbands that don't fit on a little backing like the bobbies I made long tags that I can staple around the item.  I printed the long tags on craft paper and scrap-book paper, then I cut out and cut the edges with special scissors.  
Handmade Tags
I'm planning on making my own holiday wrapping paper with stamps on craft paper.  Here are the boxes I bought from Uline.

Thursday, October 25, 2012

Bjork Swan Dress Costume


I just entered this dress into a radio contest for musical costumes.  I made it a year or two ago (ah! can't remember!)  using TONS of tulle.  I made it in two parts: a satin under dress and an attaching swan neck.  I made the bodice texture by folding the tulle into little triangles and sewing it on in rows.  I was trying to approximate the look of feathers.  This is the part that took the longest.  For the skirt I made attached tiered, fluffy, voluminous skirts to the waist and also sewed a separate tulle tutu-like skirt that I could slip on under the other skirts to add to the volume.  I put in a side zipper. 

The one-shouldered strap ended about 4 inches below my shoulder and attached over a button I sewed on the end of the swan neck.  The swan neck was made like a stuffed animal, with orange felt and black pleather for the head.  The exposed area of the neck was sewed with layers of heavy duty sew-in interfacing that I cut to look like feathers.  The part of the neck that looped behind my neck was covered in white stretch lace fabric. I think I liked the swan part so much that I unconsciously made the swan head bigger than the original dress, lol, that really wasn't quite intentional, but I still like it. 

cool camera effect, huh? 


Wednesday, October 24, 2012

ZombiCon 2012~ Success!

taken out by a rogue green shell, such senseless violence...
itsa him! zombie mario!
  
No, we didn't win the costume contest (we actually missed it ;_; ), but based on the amount of random drunken shout-outs we got we were a crowd favorite!_!  My bf cracked me up each time he responded in a high Mario voice, "Itsa me!  Maario!"  Too bad Peach doesn't have any cute catch-phrases.  The street festival was from 6 to midnight, but lots of people linger around at clubs, etc.  We didn't get there till 9:30 because we were still sewing/ making ourselves up till 9...
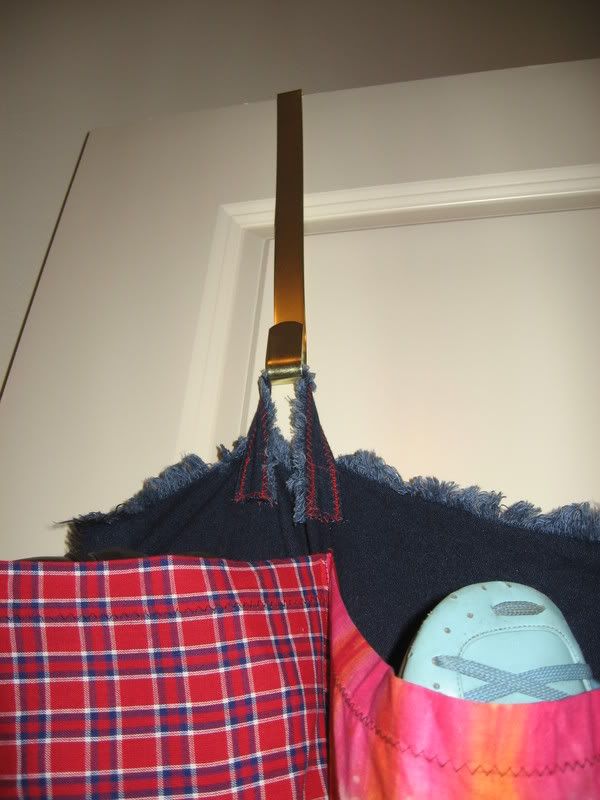
why so blurry???  :(


The Making of Zombie Peach and Mario:

I already had my concept drawing and had picked out a pattern at Jo-Ann's $0.99 pattern sale: Simplicity 2813, an adult Snow White/ Cinderella costume pattern.  I bought my fabric at the same sale, however the costume satin wasn't as wide as most fabrics are so I ended having to drive to the store again for more fabric-- and that's considering that half my skirt is eaten up! 

I decided to make a muslin of the bodice- my first time ever actually making a non-wearable muslin, and thank God I did.  After making the muslin I saw that I would need extra inches at the waist (and I've been so good about hitting up the gym too!  it's the pattern, it has to be!) and was able to add those to the pattern pieces at the side seams.  I also raised the neckline and added a scalloped contrast neckline edging.  First I made a pattern piece similar to the way you would make one for a facing, except with scallops and making it so it would peek out beyond the finished neckline.  I followed directions for making the Cinderella neckline (albeit, much higher because of my altered pattern pieces) and then added my scalloped edge underneath it.  For the skirt I added a contrast bottom band to the half that was going to stay intact. 

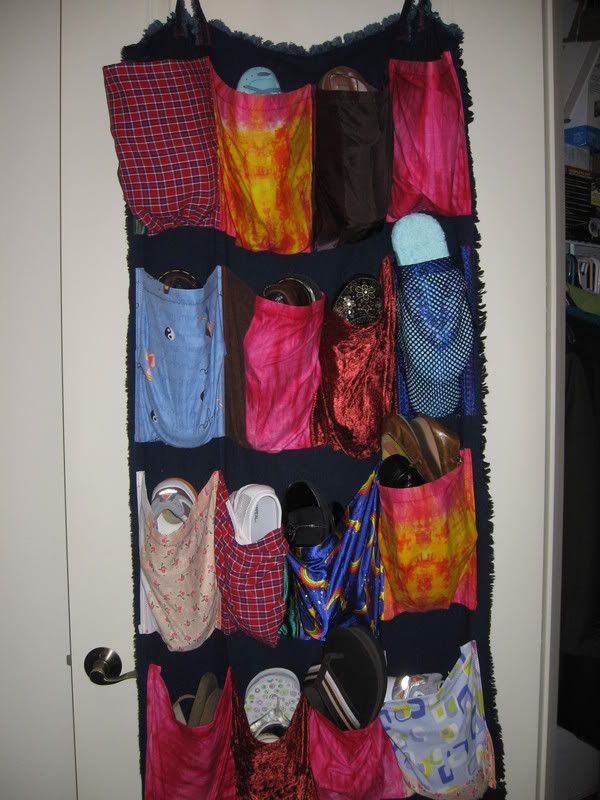
When it was all sewn up and done I did the most difficult thing ever... attack a beautiful dress I had just spent 2 weeks sewing up.  Scissors in hand I cut slashes in the right sleeve, removed part of the bottom of the right side of the skirt.  To give it a more natural ragged look I twisted the fabric and snipped haphazardly, then tugged and ripped and rubbed raw edges against the carpet to help it fray. 

For the petticoat, I made this in a hurry the day of and just sewed all layers together by making a casing and thread the elastic up top, then I cut through all layers in strips and scrunched them up, randomly tying some of them together to make it look like a proper fluffy mess.  Something to give body to the skirt and peep through the ripped mess. 

Detail of poor Ripped up Dress
Frantic Shopping the Day Of 

So.... about 1 pm after I've finished most of my sewing my boyfriend decided it was time to START work on his costume...  >.<  So we started visiting every thrift store in the area looking for overalls.  Let me tell you- apparently overalls are in HIGH DEMAND.  At the 5th store we even heard the guy behind us asking about overalls right after we had!  Finally, bf found a pair of large ladies ones in the dress section, LOL.  It had a huge Tigger embroidery on it, but I told him in the words of Tim Gunn, "make it work."  We went by Wal-mart and picked up some red fabric and felt for the hat and a red Tshirt.  I wasn't able to find the princess crown or jeweled brooch I needed in Wal-Mart, thankfully, the Dollar Store didn't disappoint!  They even had an extra pair of while gloves so I could rip one up (and still keep both the nice long white gloves I already had both intact)  For the blue brooch I was able to find a wand at the dollar store that came with removable jewels, the blue one was perfect and I glued it to a yellow felt circle backing and pinned it to the front of the dress.
Mario Cap with Peach Petticoat on dress form

The Final Stretch

I had wanted to make a mushroom purse to go along with my dress, but sadly my bf was behind in his progress and feverishly using a seam ripper to remove the offending Tigger applique.   I was obliged to make his red hat from scratch since he forgot to buy a hat to cover with red fabric.  It ended up looking more legit that way anyway, since Mario's hat is fluffier and has a shorter brim than your average baseball cap.  This was the first hat I had made with a brim and I was pretty proud of my work- especially considering that I finished it under duress in like 20 minutes. 

After all this I mixed up acrylic paint with water to a wonderful dried blood hue and splattered and smeared my dress liberally.  I ripped up my tights and applied creepy makeup, blonde wig and crown.  And then we were ready for the night!  
rraaarrr
Costume Contest

Sunday, August 12, 2007

Huge Over the Door Shoe Thing

So between my bf and I, we have our fair share of shoes... The shoe-rack on the floor had degenerated into a massive pile of shoes that never even saw the rack. So I took action! By taking advantage of the super long doors that come with these super high ceilings we have I created a massive shoe hanger. Way cooler than the cheap sterile plastic ones you get at the store and extra roomy pockets so I can put a pair together in one pocket. (Big sneakers don't fit in one though)


Materials:
  • 2 wreath hangers
  • 1 ft by 1 ft blocks of fabric, 1 for each pocket you want to make. I had four pockets on each row, so I needed like 20 squares.
  • Thick sturdy fabric backing. Mine was really big because I made mine five rows tall. If you have a normal sized door you'd most likely want a four-rowed one. I don't know... play around with it.
  • Sewing machine, nice strong thread.

How I Made It:
  • First wash your fabric to make sure none of it will bleed when rubbing against a white door or white shoes!
  • Next I sewed four of the blocks together at the side seams and finished the edges to prevent unraveling. I sewed a nice 1" hem along the top of the whole row. I did this to all rows. Then I pressed under about 3/4" on the sides of the rows.
  • I placed the rows of pockets on the backing where I wanted them. I added pleats to the bottom so that the finished bottome length of each square of fabric was about 7". This gathering gives the pockets the fullness I wanted.
  • Then I arranged the row of pockets against the backing so that it was right sides together, with the top hemmed edge on the bottom and the bottome edge where I wanted it. Kinda upside down-like. Then I sewed, and then reinforce sewed the bottom edge. When I was done I folded the fabric back up so the stitching for the bottom was on the inside of the pockets.
  • I pinned the rows to the backing along the seam lines between pockets and added whatever pleats i needed to make it the height that i wanted. My pockets were pretty deep, if you'd prefer to see more of your shoe then start out with smaller squares of fabric. I then straight stitched along either side of the seam lines about 1/4" away from the seam. I finished the edges in the same way.
  • I made two loops and attached them to the top and reinforce stiched the heck out of them. they haven't ripped out yet!!


  • loop onto the wreath hangers (make sure you get the strongest you can) and fill with shoes!!!

Sleeps with Butterflies


Tori Amos T-shirt Project

A couple years late, but I thought the cover art for her last CD was really pretty in that ren-fest dark fairy type of mysterious way so one past Sunday while everyone else was sleeping I woke up with a vision! A t-shirt vision!! I printed out the picture I wanted to reproduce/ be inspired by, gathered all my materials and revved my engines!


Materials:

  • blank t-shirt (preferably white)
  • fabric paint, fabric markers
  • shirt-sized cardboard to insert in shirt to provide stable backing and prevent bleed-through
  • pencil and any pic you want to paint
  • music
Steps to Make:

  1. I cheated and taped the picture underneath the shirt and lightly trace-sketched the major lines with a pencil to save time and get the proportions right. Even if I had wanted, tracing details would be almost impossible. I free handed her face and everything else in the background.
  2. I experimented with the fabric markers, and I really didn't like the result and tried to cover them up the whole rest of the project.
  3. Next I did my big blocks of color and all the color washes I wanted.
  4. After it was dry I came back and added some detailed color.
  5. Then after THAT was dry I came back and added the black detailing.
  6. Then I set the paint per directions on tubes.
Conclusion:

I think anyone could paint up a really nice shirt using a template like I did. If you don't feel confident free-handing it then just pick a pic that has simple lines that would be easy to trace and experiment with color washes, etc. BTW, the fabric paint I used was bought in Japan, but there's all kinds available in the states as well.